- Trang Chủ
- Giới thiệu
- Sản phẩm
- Khóa Học
- Học tập
- Dịch vụ
- Thiết Kế và Lập Trình Mạch Điện Tử Theo Yêu Cầu
- Thiết Kế và Giải Pháp IOT
- Thiết Kế Phần Mềm Ứng Dụng cho Doanh Nghiệp, Nhà Máy (smart Factory)
- Tự Động Hóa, Scada Trong Công Nghiệp
- Bãi xe tự động Nha Trang (Lắp đặt, thiết kế)
- Xây Dựng Phòng Thí Nghiệm, Mô Phỏng 3D
- Giải Pháp Ứng Dụng Trí Tuệ Nhân Tạo (AI)
- Chính sách
- Liên hệ
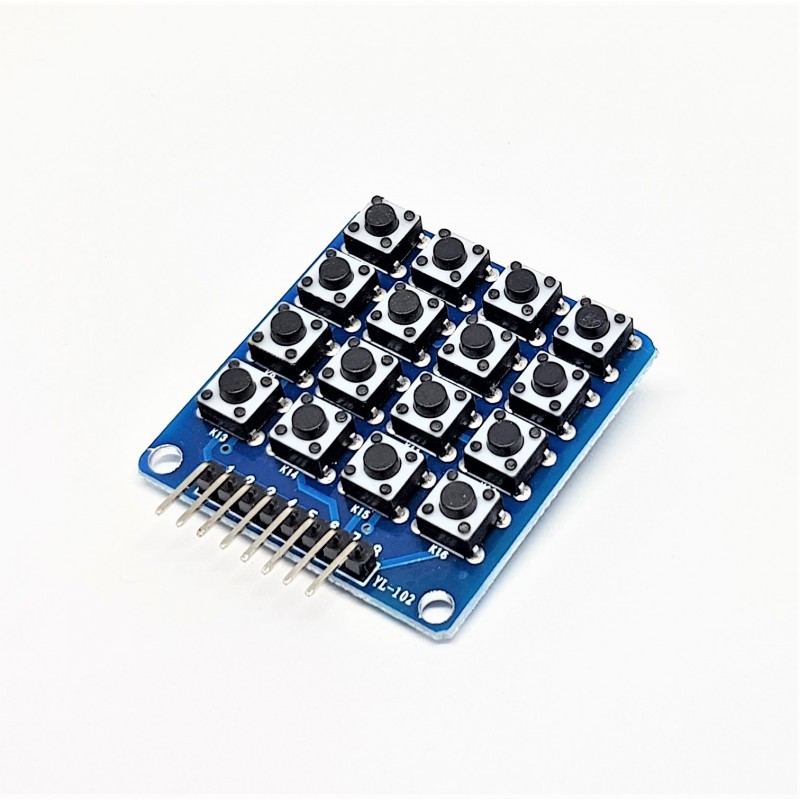
Module bàn phím ma trận 4x4
- Tình trạng: Còn hàng
- Xuất xứ : Nhập khẩu
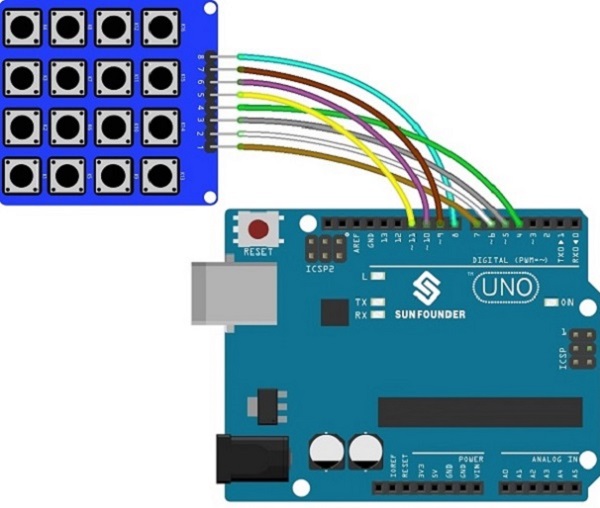
Hướng dẫn sử dụng với Arduino:
Download thư viện Keypad.h
Code cho bàn phím ma trận 4x4:
//code start
/*******************************************************
 * name: Password Lock
 * note: you need to add the Keypad folder under test experiment\code\Library to the Arduino libraries folder
 * function: when you press one button, you can see the keyvalue print on the serial monitor
 * Keypad	   Uno
 * X1 / 8	    8
 * X2 / 7	    9
 * X3 / 6           10
 * X4 / 5           11
 * Y1 / 4           4
 * Y2 / 3           5
 * Y3 / 2           6
 * Y4 / 1           7
 *
 *********************************************************/


#include <Keypad.h>   //use the Keypad libraries

const byte ROWS = 4; //four rows
const byte COLS = 4; //four columns
//define the cymbols on the buttons of the keypads
char hexaKeys[ROWS][COLS] =
{
  {
    '1','2','3','4'      }
  ,
  {
    '5','6','7','8'      }
  ,
  {
    '9','A','B','C'      }
  ,
  {
    'D','*','0','#'      }
};
byte rowPins[ROWS] = { 4, 5, 6, 7}; //connect to the row pinouts of the keypad
byte colPins[COLS] = { 8, 9, 10, 11}; //connect to the column pinouts of the keypad

//initialize an instance of class NewKeypad
Keypad customKeypad = Keypad( makeKeymap(hexaKeys), rowPins, colPins, ROWS, COLS);

void setup()
{
  Serial.begin(9600);
}

void loop()
{
  readKey();
  //delay(100);
}

void readKey()
{
  int correct = 0;
  char customKey = customKeypad.getKey();//get the key value
  if(customKey)
  {
    Serial.print("keyValue: ");
    Serial.println(customKey);
  }
  //delay(100);
}


